Setting your email out of office is something most people do only occasionally, and therefore can be unfamiliar to many. However, an auto-reply helps present a professional face for your business or organisation while you’re away enjoying the holiday season, and provides reassurance to those trying to contact you.
Here are our handy guides for setting up your auto-reply:
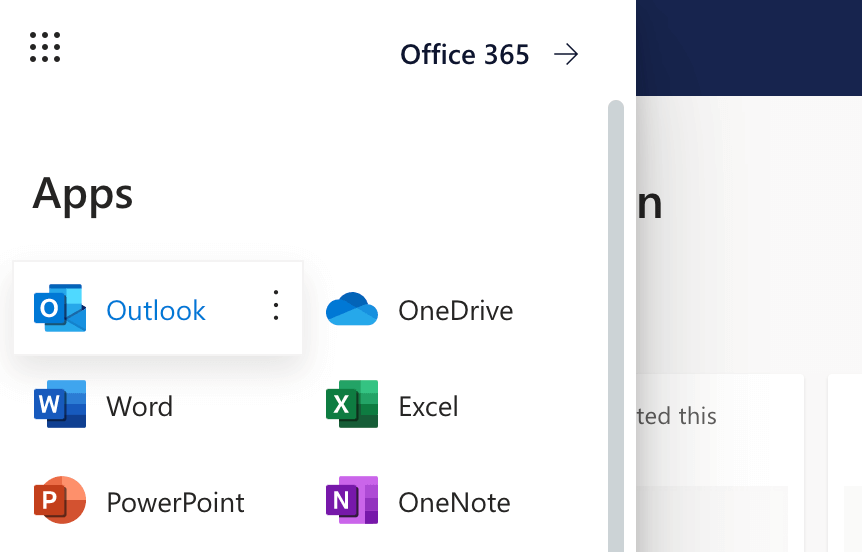
Outlook 2019 Web / Outlook.com
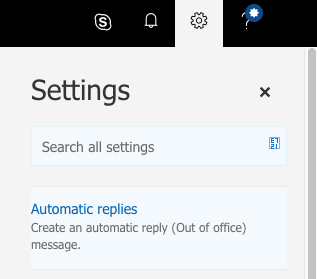
1. Open Outlook from your Office 365 Apps, and click the ‘Settings’ cog icon in the top right of your browser. Click ‘Automatic Replies’.
(If using Microsoft’s Outlook.live.com free personal service, you may need to click ‘View All Outlook Settings’ in your Settings tab for Automatic replies to be visible.)
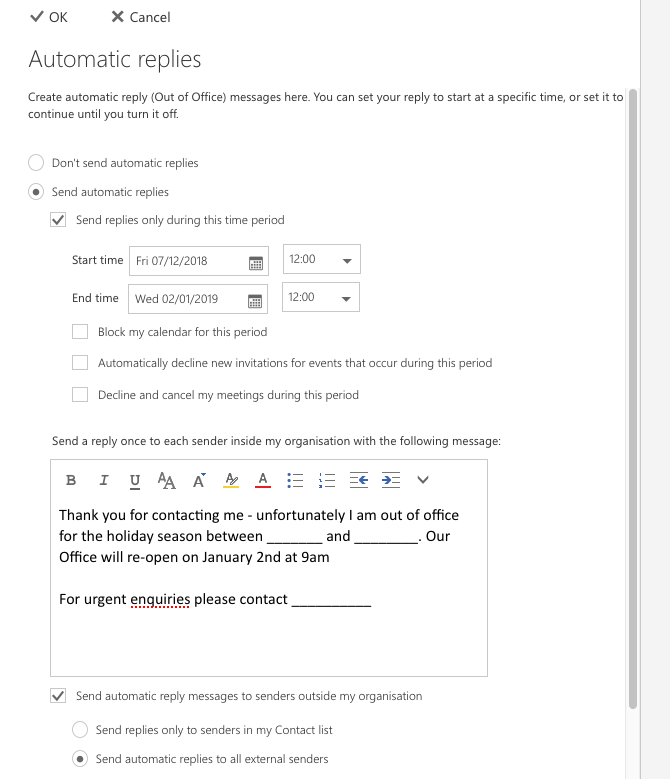
2. Outlook will open your Autoreply settings. To turn on your Automatic replies, tick the top box labelled ’Send Automatic Replies’, and enter the text for your auto reply in the text box.
Choose the date and time period you wish your Out Of Office to remain active for, and when ready, click ‘OK’
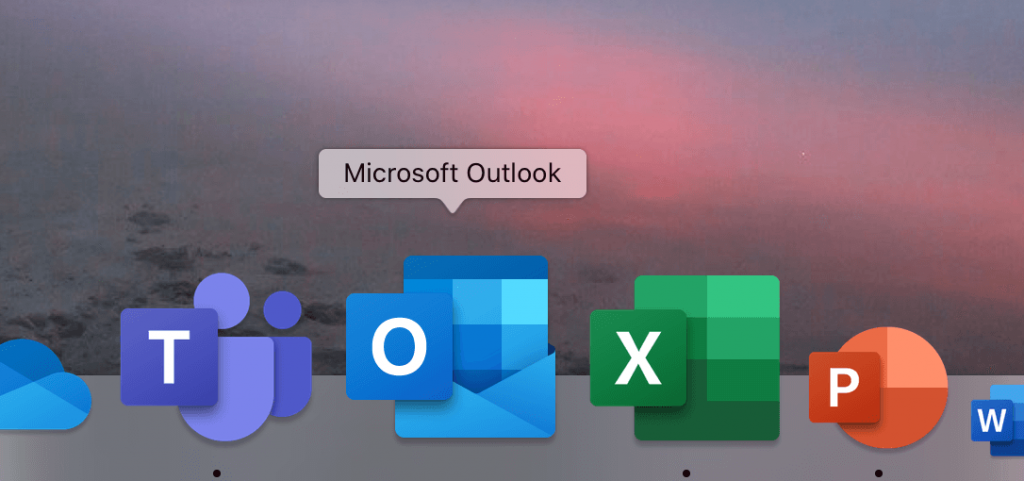
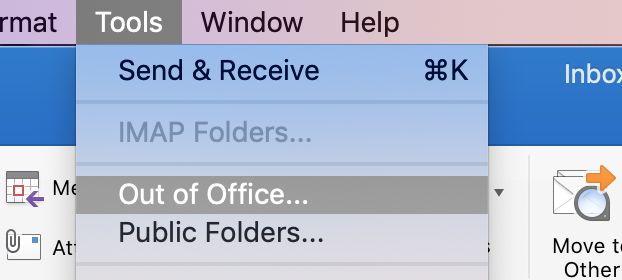
Outlook 2019 (for Mac)
1. Open Outlook from your Applications, click ’Tools’ from the Menu Bar and select ‘Out Of Office’.
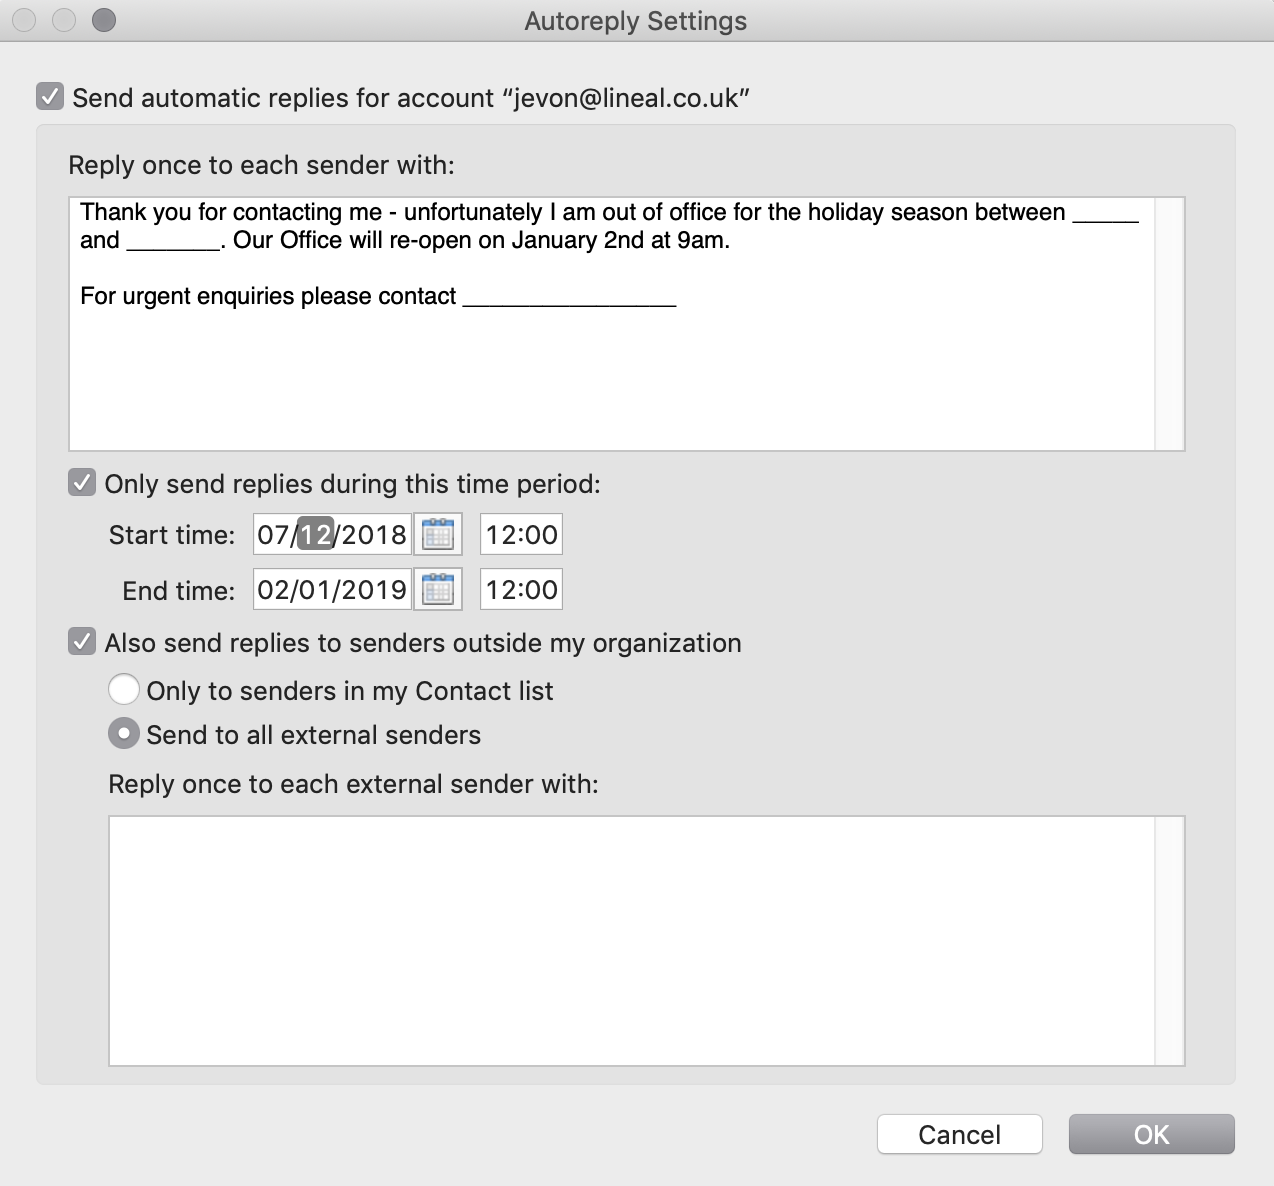
2. Outlook will open your Autoreply settings. To turn on your Automatic replies, tick the top box labelled ’Send Automatic Replies’, and enter the text for your auto reply in the top box.
Choose the date and time period you wish your Out Of Office to remain active for, and when ready, click ‘OK’.
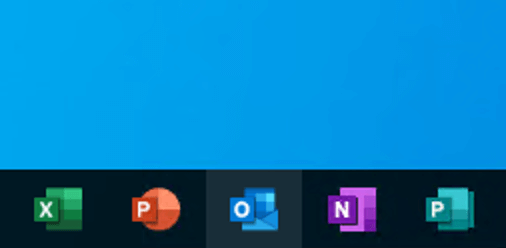
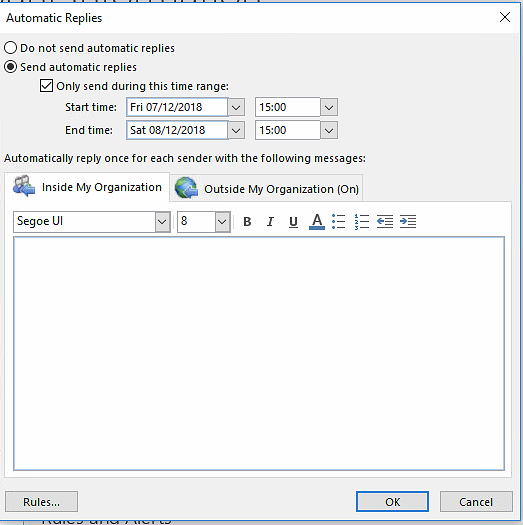
Outlook 2019 (for PC)
1. Open Outlook and click to the ‘File’ Menu from the top toolbar.
2. From the ‘Info’ Tab click the ‘Automatic Replies/Out Of Office’ Button to open the Automatic Replies Window.
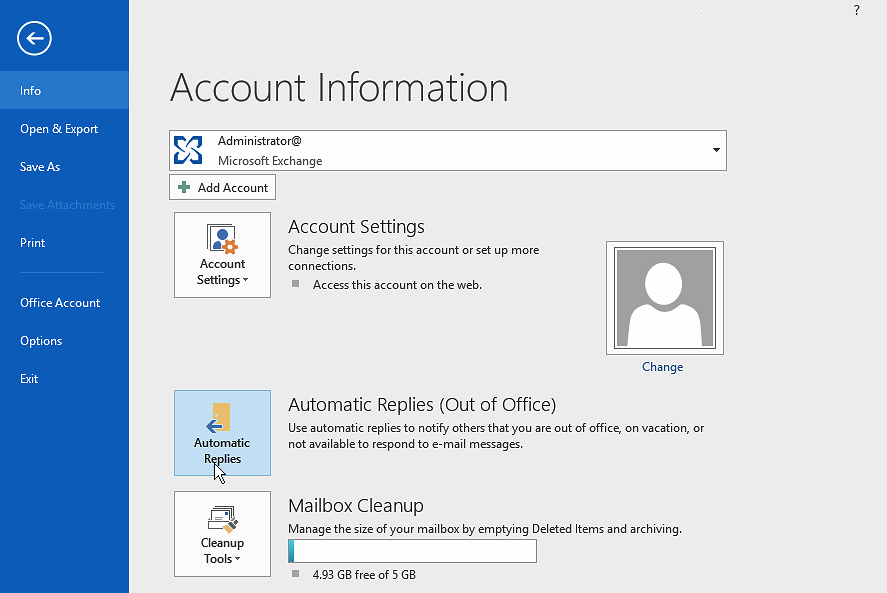
3. Click ’Send Automatic Replies’ at the top – choose the date and time period you wish your Out Of Office to remain active for, enter the message you wish to use for your Autoreply in the ‘Outside My Organisation’ text field, and click ’OK’.
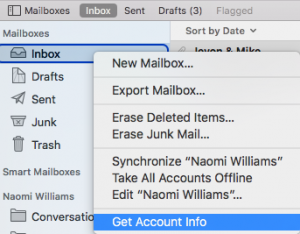
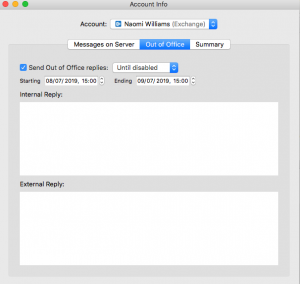
Mac Mail
1. Open Mac Mail
2. Right click on the left hand navigation panel and select get Account Info.
OR – If you right click on a file stored in your own mailbox you will have a direct link to your Out of Office
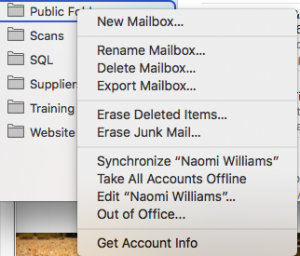
3. Click ’Send Out of Office Replies’ – choose the date and time period you wish your Out of Office to remain active for, enter the message you wish to use for your Autoreply in the ‘Internal Reply and External reply’ text fields, and click the red close icon in the top left.

Gmail
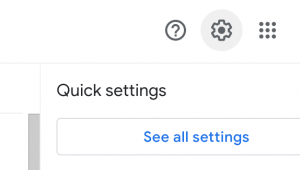
1. Open Gmail in your web browser, and click the cog icon in the top right.
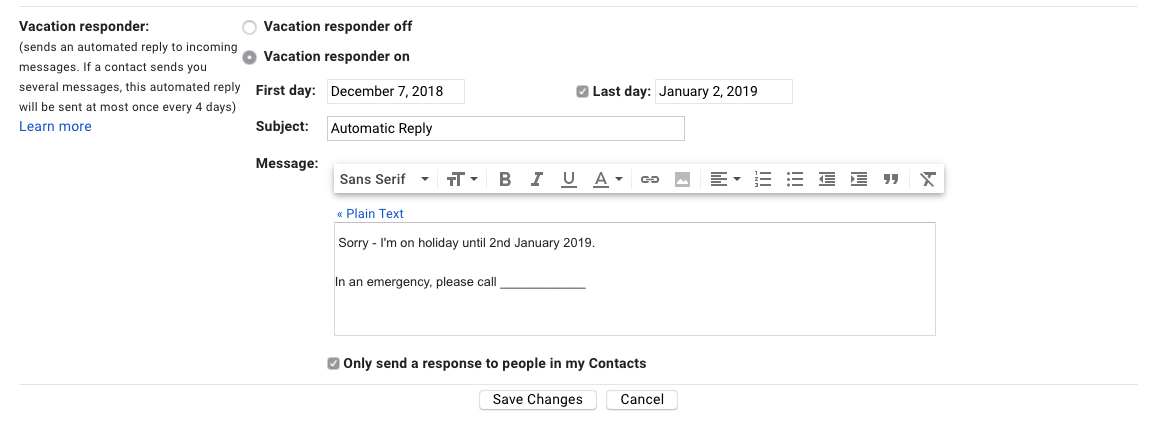
2. Open ’Settings’, click ‘See All Settings’ and scroll down to the section named ‘Vacation Responder’.
3. Switch Vacation Responder to ‘On’. Choose the date and time period you wish your Out Of Office to remain active for, enter the message you wish to use for your Autoreply in the text field, and click ‘Save Changes’.

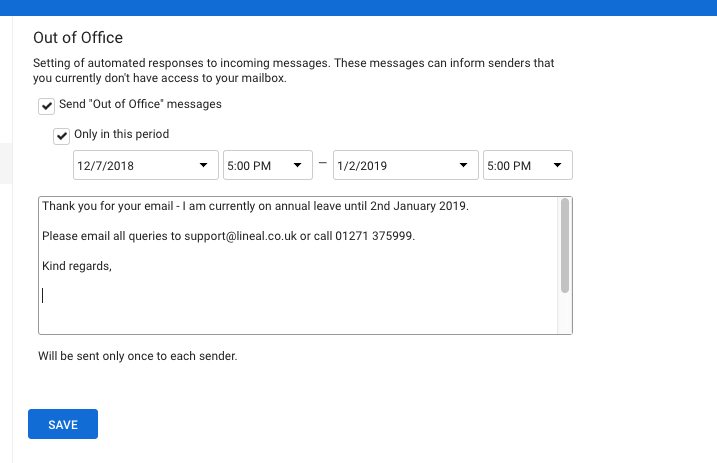
Kerio Webmail
1. Sign in to Kerio Webmail, and click your email name in the top right of the browser window. Choose ‘Out Of Office’ from the dropdown Menu.
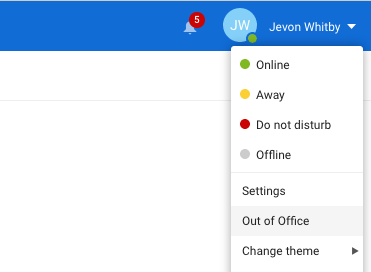
2. Tick ’Send Out Of Office Message’, choose the date and time period you wish your Out Of Office to remain active for, enter the message you wish to use for your Autoreply in the text field, and click ’Save’.

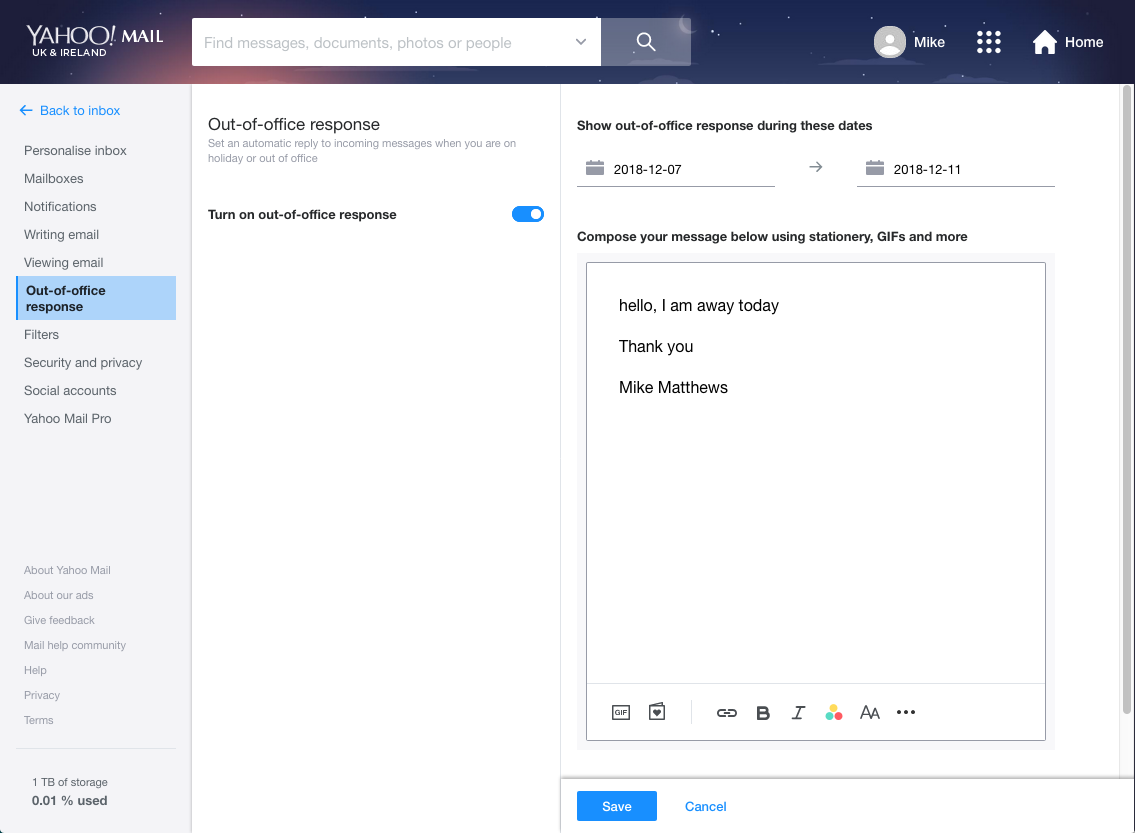
Yahoo! Mail
1. Sign in to Yahoo! Mail and click the cog icon in the top right corner of your browser to access your settings. Click ‘More Settings’
2. Click ‘Out Of Office’ Response from the left hand menu. Toggle the ‘Turn On Out-Of-Office Response’ Switch to ON.
3. Enter the to and from dates you wish your out of office to remain on for, enter the auto-response in the text box, and click ‘Save’.

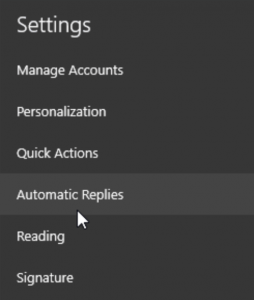
Windows 10 Mail App
- Open Mail and click the settings cog in the bottom right of the menu.
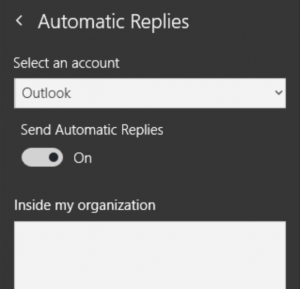
2. Select ‘Automatic Replies’ from the settings menu
3. Select your email account, toggle Automatic replies to ‘ON’ and enter text for your automatic reply for internal and/or external contacts.
For IT support advice and guidance, contact Lineal today.