Google & Yahoo Tighten Email Rules: What to Expect

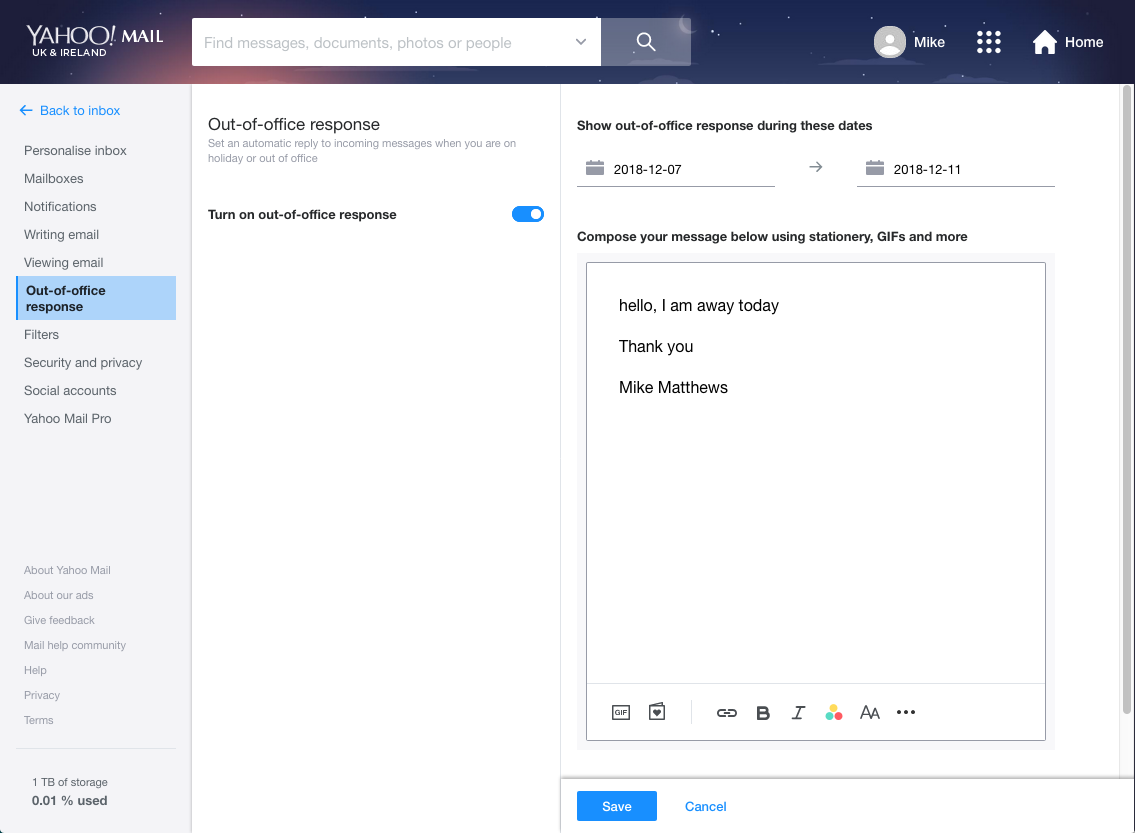
Major email providers including Google, Yahoo and AOL are set to tighten rules on incoming email – making accounts more secure against SPAM and demanding more of bulk senders who want to see their emails delivered.

Google and Yahoo alone represent more than two billion email accounts, many of them belonging to individual consumers for personal use. Estimates suggest around 70% of these have no protection against domain spoofing.

Until recently, even many basic security protocols such as SPF (checking whether email header and ‘sent from’ address match) were not enforced on major email platforms such as gmail – allowing fraudulent emails to unsuspecting users. This made phishing emails easier to circulate, harder to detect, and has been recognised as one of the biggest enablers for cyber security attacks.

DKIM – a protocol that signs both the real domain and email with a cryptographic signature that email clients can cross-reference for authenticity – is also often absent, with email providers increasingly looking to demand better standards from email senders.

From February 2024, bulk email senders must adhere to the following requirements outlined by Google and Yahoo:


New Sender Rules

SPF & DKIM Enforced – Business and organisations that need their emails to be delivered safely will have to add SPF & DKIM settings to their domains and mail servers that verify whether emails purporting to be from them are genuine, and have not been tampered with. Without checks in place, Gmail and Yahoo may reject those emails altogether.

Easy Unsubscription – bulk emails must offer ‘one-click’ unsubscribe options for recipients, making it easy for email recipients to opt-out of repeated unwanted messages, and keep clutter under control.

DMARC, the most challenging of the requirements, will be enforced for bulk email senders sending more than 5,000 emails per day, aimed at preventing rapid phishing scams and other mass attempts at fraudulent communications.


For those communicating with the public, the changes are likely to prove crucial, and IT managers need to prepare carefully to ensure their emails continue to be trusted.


For Cyber Security assistance and expertise, please contact our team today.


How to Set Email Out Of Office

Setting your email out of office is something most people do only occasionally, and therefore can be unfamiliar to many. However, an auto-reply helps present a professional face for your business or organisation while you’re away enjoying the holiday season, and provides reassurance to those trying to contact you.

Here are our handy guides for setting up your auto-reply:


outlook web


Outlook 2019 Web / Outlook.com

1. Open Outlook from your Office 365 Apps, and click the ‘Settings’ cog icon in the top right of your browser. Click ‘Automatic Replies’.

(If using Microsoft’s Outlook.live.com free personal service, you may need to click ‘View All Outlook Settings’ in your Settings tab for Automatic replies to be visible.)

2. Outlook will open your Autoreply settings. To turn on your Automatic replies, tick the top box labelled ’Send Automatic Replies’, and enter the text for your auto reply in the text box.

Choose the date and time period you wish your Out Of Office to remain active for, and when ready, click ‘OK’


outlook for mac


Outlook 2019 (for Mac)

1. Open Outlook from your Applications, click ’Tools’ from the Menu Bar and select ‘Out Of Office’.

2. Outlook will open your Autoreply settings. To turn on your Automatic replies, tick the top box labelled ’Send Automatic Replies’, and enter the text for your auto reply in the top box.

Choose the date and time period you wish your Out Of Office to remain active for, and when ready, click ‘OK’.


outlook 2019


Outlook 2019 (for PC)

1. Open Outlook and click to the ‘File’ Menu from the top toolbar.

2. From the ‘Info’ Tab click the ‘Automatic Replies/Out Of Office’ Button to open the Automatic Replies Window.

3. Click ’Send Automatic Replies’ at the top – choose the date and time period you wish your Out Of Office to remain active for, enter the message you wish to use for your Autoreply in the ‘Outside My Organisation’ text field, and click ’OK’.


mac mail

Mac Mail

1. Open Mac Mail

2. Right click on the left hand navigation panel and select get Account Info.

Mac Mail out of office

OR – If you right click on a file stored in your own mailbox you will have a direct link to your Out of Office

Mac Mail out of office

3. Click ’Send Out of Office Replies’ – choose the date and time period you wish your Out of Office to remain active for, enter the message you wish to use for your Autoreply in the ‘Internal Reply and External reply’ text fields, and click the red close icon in the top left.

Mac mail set out of office


gmail icon

Gmail

1. Open Gmail in your web browser, and click the cog icon in the top right.

2. Open ’Settings’, click ‘See All Settings’ and scroll down to the section named ‘Vacation Responder’.

3. Switch Vacation Responder to ‘On’. Choose the date and time period you wish your Out Of Office to remain active for, enter the message you wish to use for your Autoreply in the text field, and click ‘Save Changes’.


kerio


Kerio Webmail

1. Sign in to Kerio Webmail, and click your email name in the top right of the browser window. Choose ‘Out Of Office’ from the dropdown Menu.

2. Tick ’Send Out Of Office Message’, choose the date and time period you wish your Out Of Office to remain active for, enter the message you wish to use for your Autoreply in the text field, and click ’Save’.


yahoo mail

Yahoo! Mail

1. Sign in to Yahoo! Mail and click the cog icon in the top right corner of your browser to access your settings. Click ‘More Settings’

2. Click ‘Out Of Office’ Response from the left hand menu. Toggle the ‘Turn On Out-Of-Office Response’ Switch to ON.

3. Enter the to and from dates you wish your out of office to remain on for, enter the auto-response in the text box, and click ‘Save’.


windows 10 mail app

Windows 10 Mail App
  1. Open Mail and click the settings cog in the bottom right of the menu.

windows 10 mail settings

2. Select ‘Automatic Replies’ from the settings menu

windows 10 mail app settings

3. Select your email account, toggle Automatic replies to ‘ON’ and enter text for your automatic reply for internal and/or external contacts.


For IT support advice and guidance, contact Lineal today.